Create and manage vendor
What you'll learn
- How to create a vendor
- How to apply KYC/AML to verify your vendor on OwlPay
- How to check the verification status of your vendor
To make a payout to your vendor, you must complete the below steps.
- Create a vendor
- Apply KYC/AML to verify your vendor
- Check your vendor verification status
Create a vendor
Use (POST) Create a vendor to create a vendor on OwlPay.
Request
curl --request POST \
     --url https://api.owlpay.com/api/v1/platform/tunnel/vendors \
     --header 'accept: application/json' \
     --header 'authorization: Bearer {your api key}' \
     --header 'content-type: application/json' \
     --data '
{
     "name": "OwlPay Vendor",
     "application_vendor_uuid": "ven_TEST12345678",
     "email": "[email protected]",
     "country_iso": "US",
     "lang": "en",
     "description": "This is owlpay test vendor"
}
'
Response
{
    "data": {
        "uuid": "ven_z9SFo3i5lkzQZkh066BZJBF",
        "object": "vendor",
        "application_vendor_uuid": "test vendor",
        "name": "owlpay vendor through api",
        "email": "[email protected]",
        "description": "",
        "note": null,
        "is_removed": false,
        "is_active": false,
        "is_vendor_kyc_passed": false,
        "status": "uncheck",
        "kyc_status_list": {
            "remit_info": {
                "status": "unchecked",
                "is_allow_update": true,
                "items": []
            }
        },
        "country_iso": "TW",
        "is_invited": false,
        "is_registered": false,
        "remit_info": [],
        "lang": "en"
    },
    "status": 200
}
API Parameter ReferenceAbout Country code, Phone code and Currency code, refer to API Parameter Mapping Table for more details.
Apply KYC/AML to verify your vendor
You have 2 methods to apply KYC and AML :
- Through API and UI: Invite a vendor user (through API) & apply KYC (through OwlPay Platform UI)
- Through API: Use (POST) Apply vendor's remit info
Method 1: Through API and UI
Use (POST) Create a vendor's invitation to send an invitation email to the user and invite him/her to join the OwlPay platform.
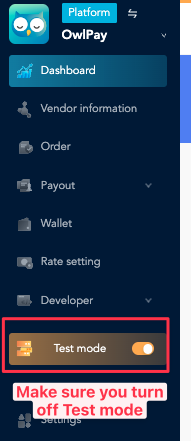
Check your environmentYou must invite the vendor user on live mode.
Check the mode your company is using on OwlPay Platform .
Request
curl --request POST \
     --url https://api.owlpay.com/api/v1/platform/tunnel/vendor_invite \
     --header 'accept: application/json' \
     --header 'authorization: Bearer {your api key}' \
     --header 'content-type: application/json' \
     --data '
{
     "vendor": {
          "uuid": "ven_TEST12345678"
     },
     "email": "[email protected]",
     "lang": "en"
}
'
Response
{
    "data": {
        "object": "vendor_invite",
        "vendor_uuid": "ven_TEST123456",
        "connect_invite_hash": "xxxxxxxxxxxx",
        "invite_url": "https://auth.owlting.com/...",
        "email": "[email protected]",
        "is_owlpay_send_email": false,
        "expired_at": "2021-09-11T16:23:07+00:00",
        "created_at": "2021-09-10T16:23:07+00:00"
    },
    "status": 200
}
After the user joins, follow the KYC identity verification > Identity verification - Vendor to complete the KYC.
Method 2: Through API
Use (POST)Apply vendor's remit info to apply KYC.
Payout Channel & AML DataMake sure you fill in the correct payout channel and the corresponding AML data (
aml_data).For AML data details, refer to OwlTing AML Schema Tool.
You can only fill in the payout channel that is enabled in Payout extensions page.
Request
curl --request POST \
     --url https://api.owlpay.com/api/v1/platform/tunnel/vendors/vendor_uuid/remit_info/apply \
     --header 'accept: application/json' \
     --header 'authorization: Bearer sk_test_QyO8vI0SvGrj2cs1kiU8xws2w6V5P5yh0R8k' \
		 --header 'content-type: application/json' \
     --data '
{
  "aml_data": {
    "currency": "TWD",
    "companyName": "tset vendor through api",
    "companyCountry": "AD",
    "businessAddressCity": "test",
    "businessAddressArea": "test",
    "businessAddress": "test",
    "companyPhoneCode": "AD",
    "companyPhoneNumber": "0912345678",
    "companyEmail": "[email protected]",
    "companyId": "12345678",
    "customName": "customName company",
    "bankCountry": "TW",
    "bankCode": "000",
    "branchCode": "0022",
    "accountName": "test account",
    "account": "12345678"
  },
  "payout_channel": "cathay",
  "applicant": "company"
}
'
Response
{
    "data": [
        {
            "payout_gateway_channel": "cathay",
            "payout_gateway_key": "MyB2B_batch_payout",
            "payout_gateway": "Cathay United Bank - Global MyB2B",
            "status": "checking",
            "sort": 0,
            "is_enable": true,
            "detail": {
                "country_code": "TW",
                "bank_code": "000",
                "branch_code": "0022",
                "account": "12345678",
                "account_name": "test account",
                "currency": "TWD"
            }
        }
    ],
    "status": 200
}
Check your vendor verification status
Use (GET)List all vendor's remit info to check the KYC/AML status of your vendor.
When the status is approved, you can go to the next steps.
Request
curl --request GET \
     --url https://api.owlpay.com/api/v1/platform/tunnel/vendors/{vendor_uuid}/remit_info \
     --header 'accept: application/json' \
     --header 'authorization: Bearer sk_test_QyO8vI0SvGrj2cs1kiU8xws2w6V5P5yh0R8k'
Response
{
    "data": [
        {
            "payout_gateway_channel": "cathay",
            "payout_gateway_key": "MyB2B_batch_payout",
            "payout_gateway": "Cathay United Bank - Global MyB2B",
            "status": "approved",
            "sort": 0,
            "is_enable": true,
            "detail": {
                "country_code": "TW",
                "bank_code": "000",
                "branch_code": "0022",
                "account": "12345678",
                "account_name": "test account",
                "currency": "TWD"
            }
        }
    ],
    "status": 200
}| Status | Description |
|---|---|
| uncheck | The vendor is not verified yet. |
| rejected | The verification is rejected. Check the rejected reason on the OwlPay platform (refer to Payout extensions page). |
| checking | The vendor is under checking. |
| approved | The vendor is verified. |
Next steps
- Learn more about Vendors API details.
- After the vendor information is reviewed and approved by the OwlPay team, you can Create and manage order.
Updated over 1 year ago